![How to Get Rid of Take All Root Rot [Fungus & Lawn Disease]](https://img.youtube.com/vi/yPjUFfTWKgA/hqdefault.jpg)
Quick Answer
Treat take-all root rot by applying a fungicide containing azoxystrobin or thiophanate-methyl in early spring or fall, then adjust soil pH to 5.5–6.0 using sulfur, and improve drainage to reduce moisture stress. Consistent cultural practices — proper mowing, watering, and fertilization — are just as critical as chemical treatment for long-term recovery.
Key Takeaways
- Take-all root rot is caused by the soil-borne fungus Gaeumannomyces graminis, which attacks grass roots rather than blades
- Early spring and fall are the most effective treatment windows
- Lowering soil pH with sulfur applications can suppress fungal activity
- Fungicides help but won't work without correcting drainage and cultural practices
- Full lawn recovery can take one to two growing seasons
Introduction
Take-all root rot is one of the most frustrating lawn diseases homeowners face, particularly those with St. Augustinegrass, bermudagrass, and centipedegrass in warm, humid climates. Because the disease attacks roots underground, by the time you see yellowing, thinning turf above ground, the damage is already well underway[1]. Understanding the disease cycle and combining multiple treatment strategies gives you the best chance at recovery.
What Does Take-All Root Rot Look Like?
Identifying take-all root rot early is critical before committing to a treatment plan.
Symptoms to Watch For
- Irregular yellow or light green patches that resist fertilization
- Grass blades that pull easily from the ground due to rotted roots
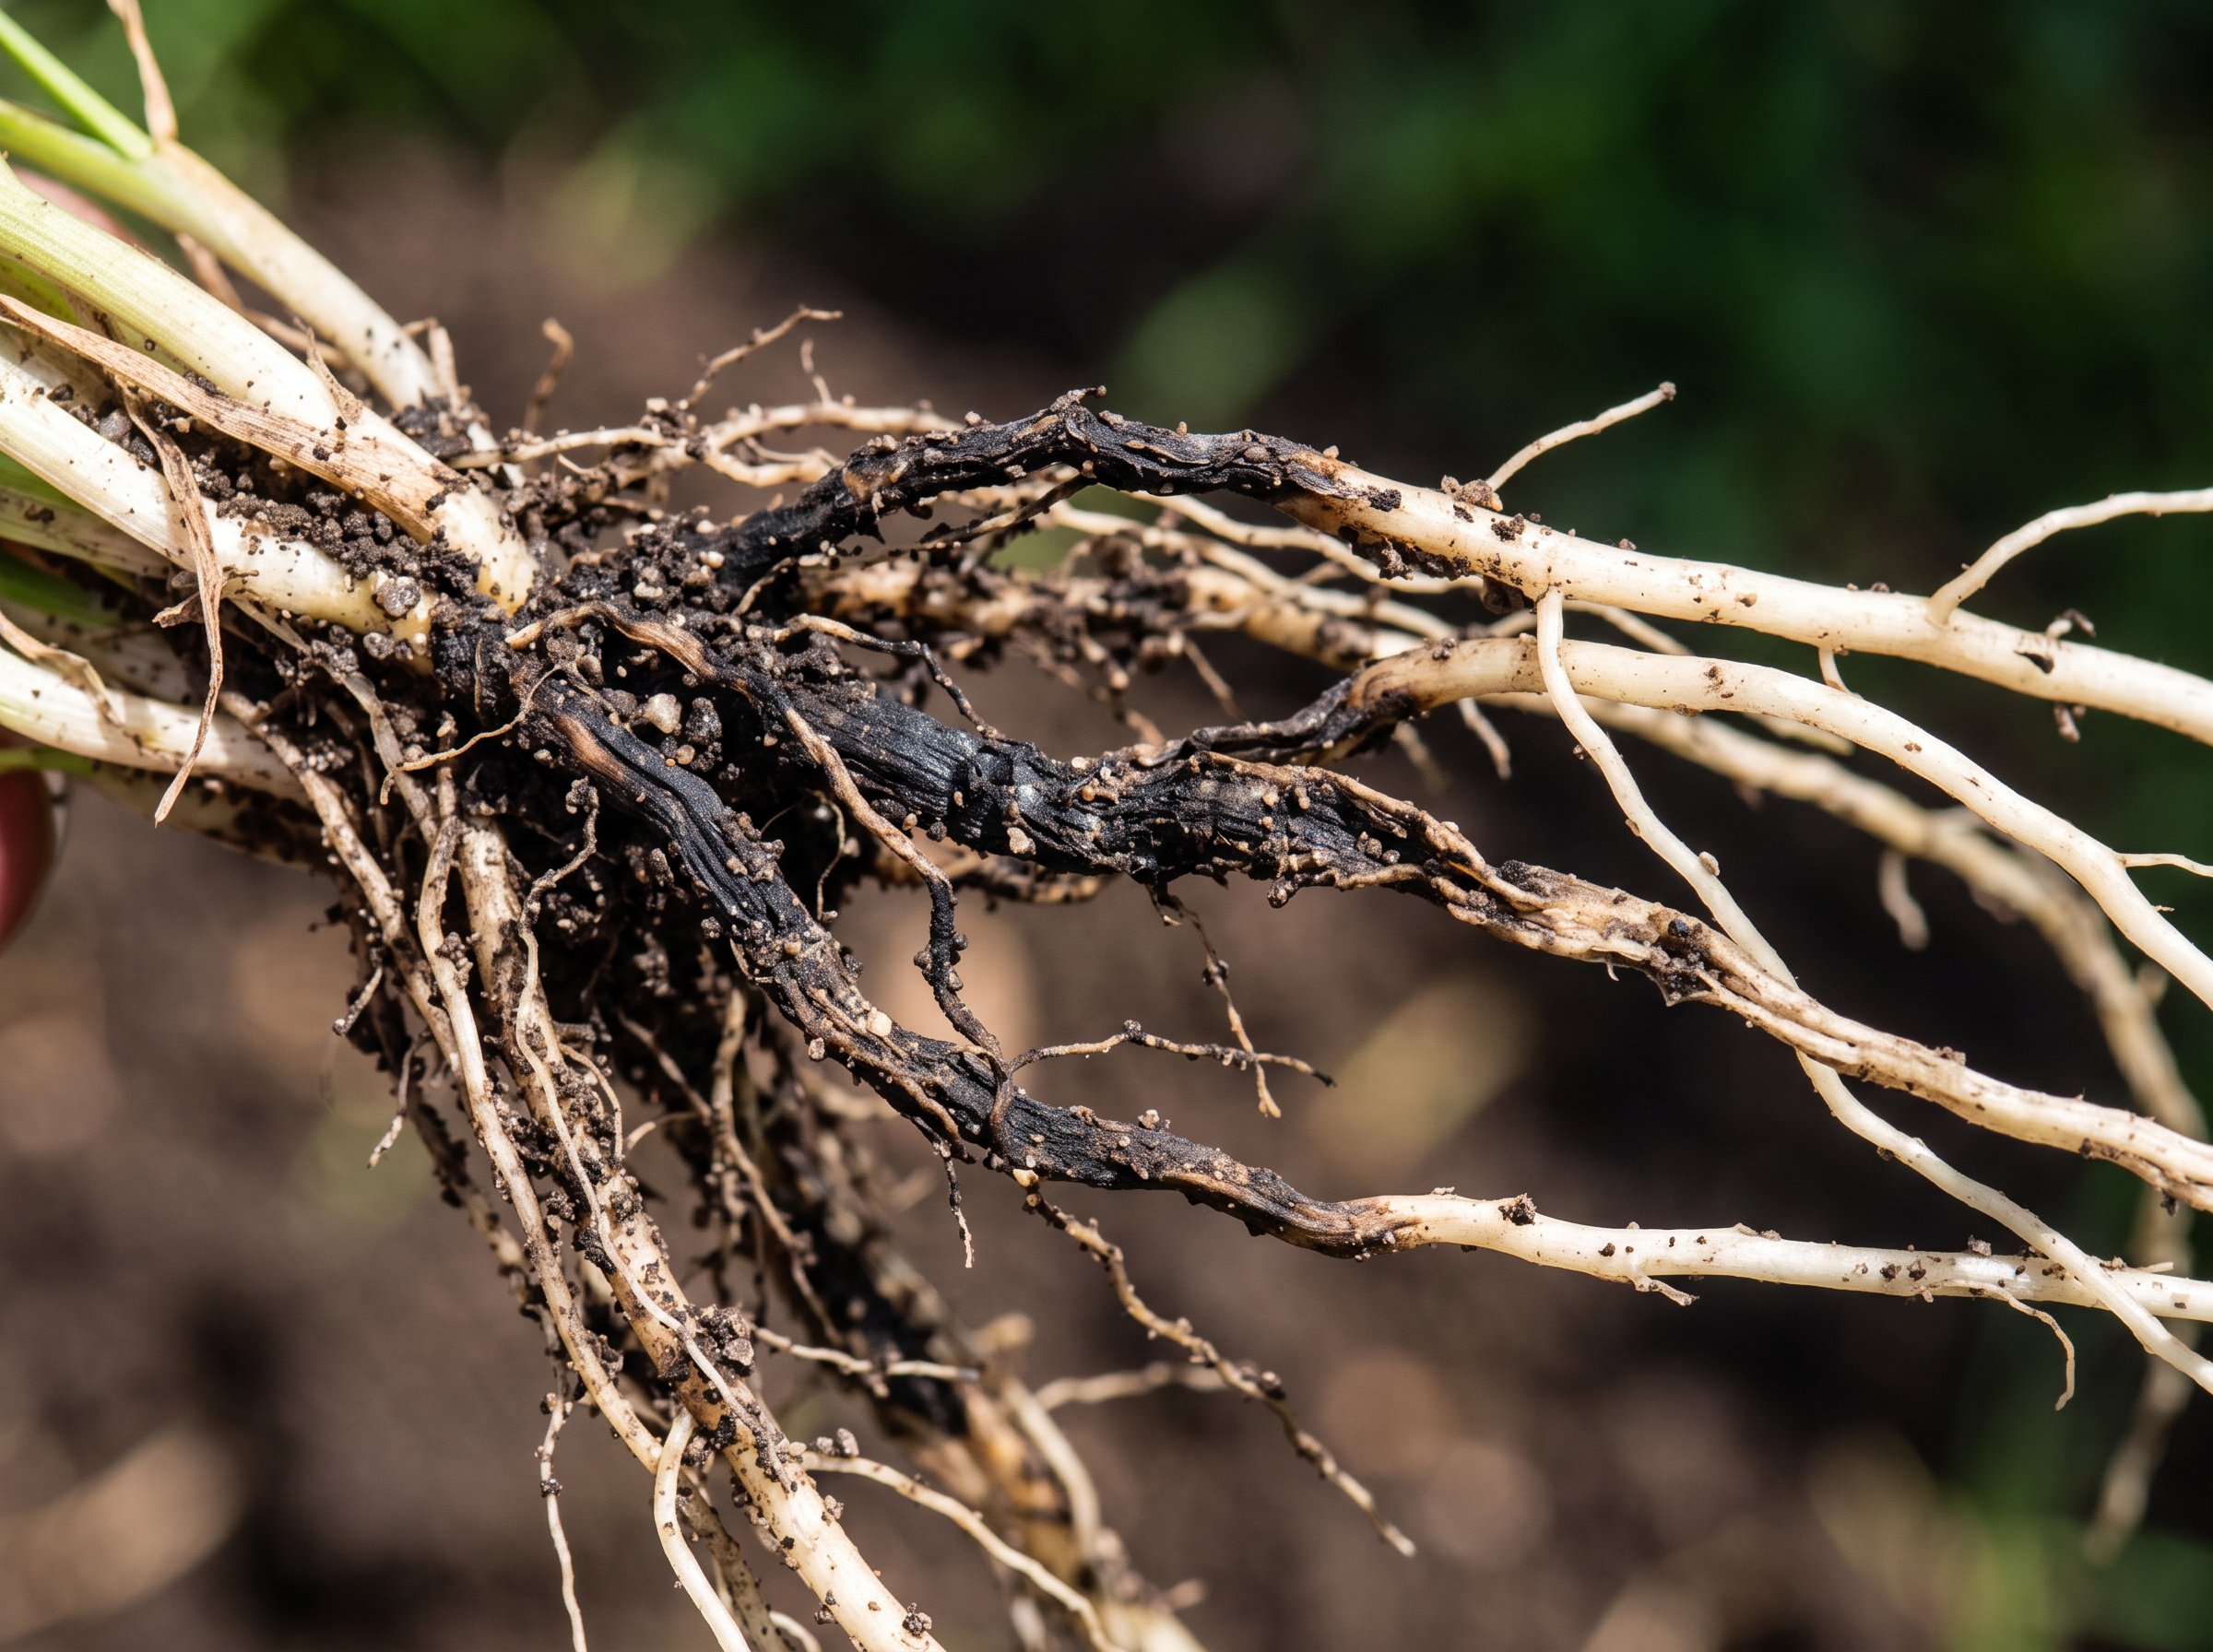
- Roots appear black, stubby, and decayed rather than white and healthy
- Patches often appear or worsen after drought stress or heavy rainfall[2]
How It Spreads
The fungus Gaeumannomyces graminis survives in the soil and infected plant material. It thrives in cool, wet conditions — typically early spring and fall — and spreads through infected soil, equipment, and water movement across your yard[3]. Overwatering and poor drainage dramatically accelerate the disease.
How Do You Treat Take-All Root Rot Step by Step?
Effective treatment combines fungicide application, soil pH correction, and improved cultural care. No single step works in isolation.
Step 1: Confirm the Diagnosis
Before treating, confirm you're dealing with take-all and not a similar-looking issue like dollar spot or brown patch. Pull several grass plants from the affected edge of a patch and inspect the roots — black, rotted roots are the clearest indicator[1].
Step 2: Apply a Fungicide at the Right Time
Apply a systemic fungicide labeled for take-all root rot in early spring before soil temperatures reach 65°F, or in early fall. Products containing azoxystrobin, thiophanate-methyl, or fludioxonil are commonly used[4]. Water the fungicide in lightly after application so it moves into the root zone where the pathogen lives. A second application 30 days later improves results.
Step 3: Lower Soil pH
Take-all root rot favors neutral to slightly alkaline soils. Lowering your soil pH to between 5.5 and 6.0 with granular sulfur creates a less hospitable environment for the fungus[2]. Always test your soil before amending — your local extension office or a soil testing lab can provide accurate recommendations[5].
Step 4: Correct Drainage and Watering Habits
Improve surface drainage in problem areas by aerating compacted soil. Water deeply but infrequently — ideally no more than twice per week — and always water in the early morning so turf dries before nightfall[3]. Saturated soil is the disease's best friend.
Step 5: Adjust Fertilization
Avoid heavy nitrogen applications during active disease pressure, which can push lush growth the weakened root system can't support. Use a balanced fertilizer with micronutrients and lean toward slow-release nitrogen sources once recovery begins[4].
How Long Does Recovery Take After Treatment?
Recovery from take-all root rot is a slow process. With consistent treatment, you may see improvement within one growing season, but full recovery — including complete root regeneration and dense turf cover — typically takes one to two full seasons[1][2]. Patience and persistence are essential.
During recovery, overseed bare patches with disease-tolerant grass varieties suited to your region. Avoid heavy foot traffic on affected areas to reduce additional stress on recovering roots. Continue monitoring soil drainage and maintain good mowing height — never removing more than one-third of the blade at once[3].
Conclusion: Take Action Before It Spreads
Take-all root rot won't resolve on its own. Your best path forward is to:
- Test your soil pH and adjust to the 5.5–6.0 range with sulfur
- Apply a systemic fungicide in early spring or fall and repeat 30 days later
- Improve drainage through aeration and adjust your irrigation schedule
- Fertilize cautiously with slow-release nitrogen and micronutrients
- Reseed bare areas with disease-tolerant varieties once the disease is under control
The sooner you act, the less ground you'll need to reclaim. Combining chemical and cultural treatments gives your lawn the best chance of a full recovery[4][5].