Quick Answer
Building a DIY backyard chipping green requires selecting a 15x20 foot area, installing proper drainage with sand and gravel base layers, and covering with high-quality artificial putting turf[1]. Most homeowners can complete this project for $1,500-$2,500 depending on size and materials chosen.
Key Takeaways
- Choose artificial turf over natural grass for consistent year-round performance and lower maintenance[2]
- Proper drainage with 4-6 inches of compacted base material prevents water pooling and surface irregularities[1]
- Include multiple pin positions and surrounding rough areas to simulate real course conditions
- Budget $1,500-$2,500 total cost (equivalent to $75-$125 per square foot for a 300 sq ft green)
- Consider adding practice bunkers or fringe areas to enhance training value[3]
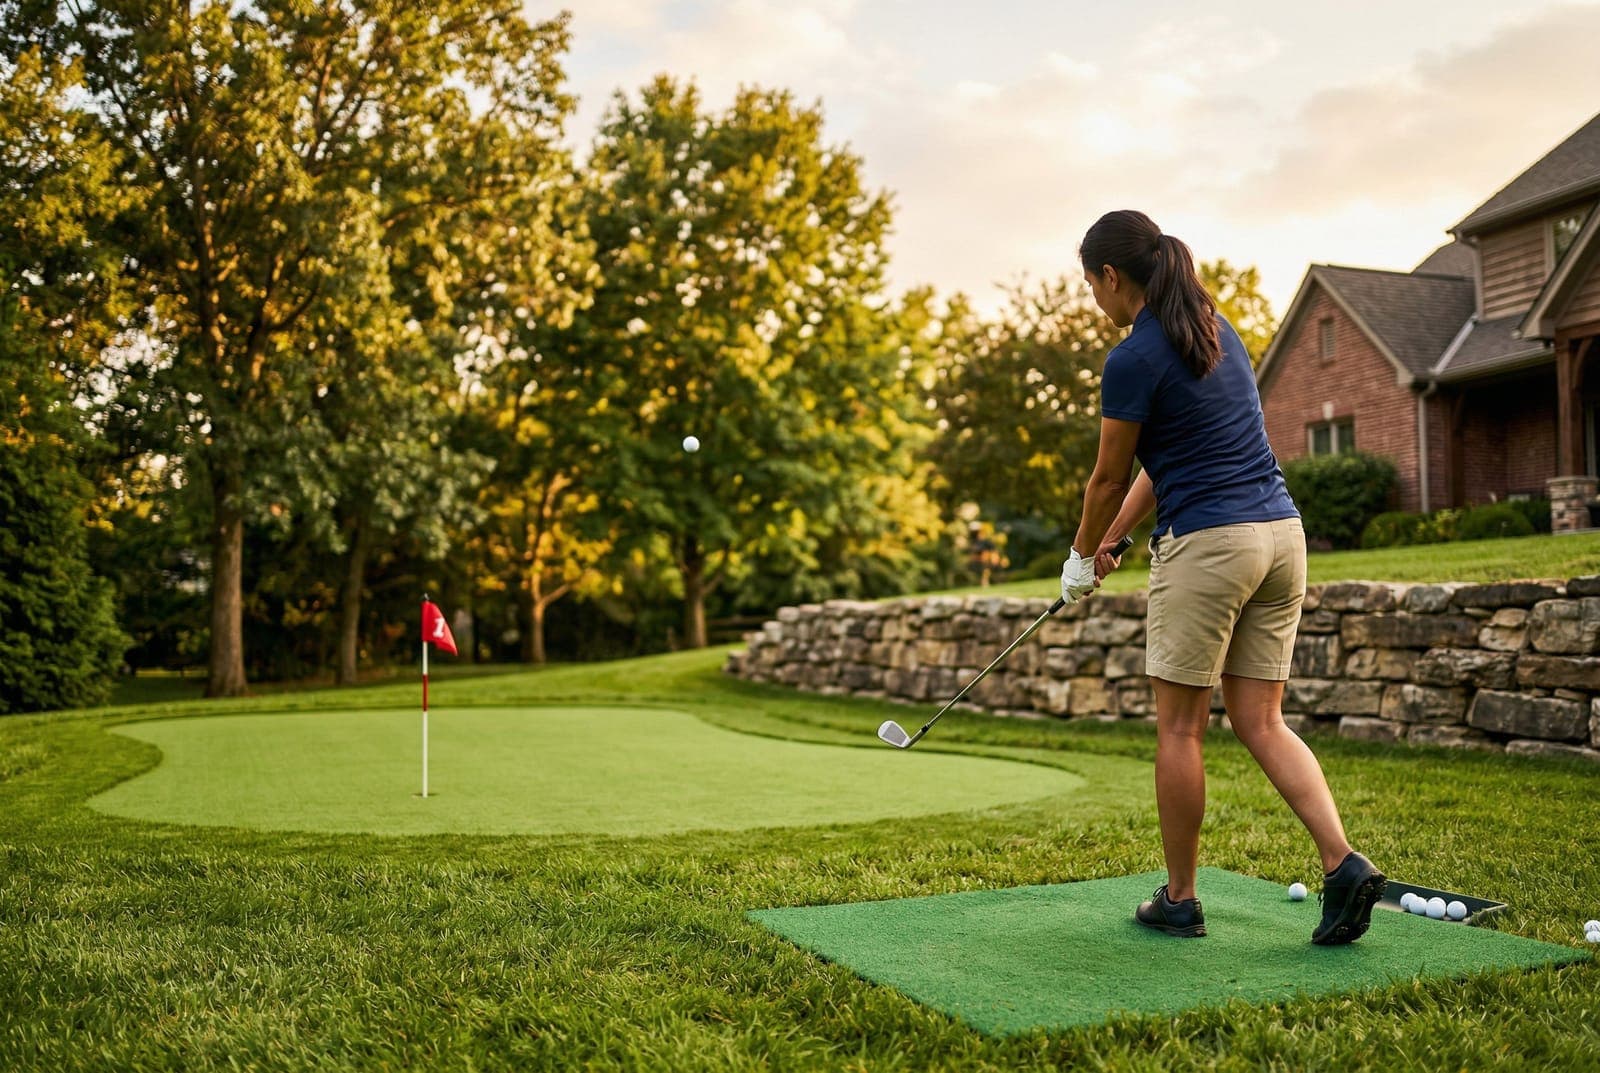
Improving your short game doesn't require expensive country club memberships or driving range fees. For a complete backyard golf setup, consider pairing this project with a DIY tee box. A well-constructed DIY backyard chipping green provides convenient, consistent practice opportunities right outside your door[4]. If you need a full plan for how to practice golf at home, even 20 minutes of daily short game work beats a two-hour weekend range session. With proper planning and materials, you can create a practice facility that rivals commercial installations.
What Size and Location Work Best for Home DIY Backyard Chipping Greens?
The ideal chipping green measures 15-20 feet wide by 20-25 feet long, providing multiple pin positions and landing areas[5]. This size accommodates shots from 10-50 yards while fitting most suburban lots. Choose a location with good drainage, morning sunlight, and easy access from your house.
Size Options by Yard and Budget
| Green Size | Square Footage | Best For | Estimated Cost |
|---|---|---|---|
| Small (10x15 ft) | 150 sq ft | Tight backyards, beginners | $800–1,200 |
| Medium (15x20 ft) | 300 sq ft | Most homeowners | $1,500–2,500 |
| Large (20x25 ft) | 500 sq ft | Serious golfers, large yards | $2,500–4,500 |
| Extra large (25x30 ft) | 750 sq ft | Multi-feature practice areas | $4,000–7,000 |
Don't go too small. Greens under 150 square feet get boring quickly — there isn't enough variety in pin placement or chip angles. But don't go too big either, or maintenance becomes a chore that eats into practice time.
Slope considerations are crucial for both drainage and realistic practice conditions. A gentle slope of 1-2% prevents water accumulation while mimicking actual green conditions[1]. Avoid areas under large trees where falling debris creates maintenance issues and blocks sunlight needed for any surrounding natural grass areas[6].
Consider your neighbors when selecting locations. Position the green away from property lines where errant balls might cause issues, and ensure adequate backstop areas with golf netting or landscaping to contain shots[4].
How Do You Build the Base and Drainage System for Your DIY Backyard Chipping Green?
Proper base construction determines your green's longevity and performance. Start by excavating 8-10 inches deep across the entire area, creating the desired final contours and slopes[1]. Remove all organic material, rocks, and debris that could create future settling issues.
Base Layer Construction (Bottom to Top)
| Layer | Material | Thickness | Purpose |
|---|---|---|---|
| 1 (Bottom) | Landscape fabric | — | Weed prevention |
| 2 | Perforated drain pipe | 4 in diameter | Water removal |
| 3 | Crushed stone (3/4-inch minus) | 4 inches | Structural base & drainage |
| 4 | Coarse sand | 2 inches | Transition layer |
| 5 (Top) | Fine masonry sand | 1 inch | Smooth putting surface base |
Install the drainage system using perforated drain pipe in a herringbone pattern, connecting to existing drainage or a dry well[5]. Cover pipes with landscape fabric to prevent sand infiltration. Each layer must be compacted with a plate compactor, lawn roller, or gas pot roller before adding the next layer[1]. Wet the crushed stone and sand before compacting for better results.
Add a final 1-inch layer of fine masonry sand, screeded smooth to match your planned surface contours[7]. Use a level to maintain a 3-foot radius around each cup location that is perfectly smooth and flat — this is critical for accurate ball roll near the holes. Proper compaction at each stage prevents future settling that creates uneven playing surfaces.
Important: Use masonry sand, not play sand. Play sand tends to be rocky and inconsistent, while masonry sand provides the smoother, more uniform surface needed for a quality putting surface.
What Type of Artificial Turf Should You Choose?
Select putting green turf specifically designed for golf applications, not standard landscape turf[2]. Our guide to the best grass for a DIY putting green covers both natural and synthetic options in detail. Quality putting surfaces feature 0.5-0.75 inch pile height with dense, upright fibers that simulate bent grass greens. Look for turf with stimpmeter ratings between 10-12 feet for realistic green speeds[3].
Turf Fiber Comparison
| Fiber Type | Durability | Ball Response | Price/sq ft | Lifespan |
|---|---|---|---|---|
| Nylon | Excellent | Most realistic | $12–18 | 15–20 years |
| Polypropylene | Very good | Good | $8–12 | 10–15 years |
| Polyethylene | Good | Decent | $5–8 | 8–12 years |
| Budget landscape turf | Poor for golf | Unrealistic | $2–5 | 5–8 years |
Nylon or polypropylene fibers offer the best durability and ball response characteristics[2]. Avoid turf with backing materials that don't drain well, as trapped moisture creates maintenance problems. Professional-grade putting turf costs $8-15 per square foot but provides superior performance and longevity compared to cheaper alternatives.
Consider turf color carefully — darker greens look more natural but show wear patterns more readily than lighter shades[7]. Some manufacturers offer turf with subtle color variations that hide traffic patterns and provide more realistic appearance.
Natural grass alternative: If you prefer real grass, you can start simple by setting a rotary mower to its lowest setting to create a basic chipping target. Upgrade to a manual reel mower (available used for $10-40) that cuts to half-inch height for better performance. Cool-season grasses like bentgrass and Kentucky bluegrass work best, though they require significantly more maintenance than synthetic options.
How Do You Install and Finish the Surface?
Roll out turf pieces carefully, ensuring grain direction runs consistently across the entire surface[7]. Professional installations run grain toward the primary viewing area for optimal appearance. Seam placement requires precision - use seaming tape and adhesive designed for outdoor turf applications.
Secure edges with landscape spikes every 6-8 inches, driving spikes at slight angles for maximum holding power[2]. Brush turf fibers upright with a stiff broom, then add silica sand infill at 1-2 pounds per square foot. This infill provides ball bounce characteristics and helps fibers stand upright.
Install cups using hole saws, positioning multiple cups for varied practice routines[3]. Quality cups feature proper depth and drainage to prevent water accumulation. Add flags and consider installing practice bunkers or rough areas around the green perimeter for comprehensive short game practice.
What Maintenance Does Your Chipping Green Need?
Regular maintenance keeps your practice green performing optimally year-round[8]. Weekly brushing with a stiff broom removes debris and keeps fibers upright, while monthly deep cleaning with mild soap removes accumulated dirt and organic matter. Avoid harsh chemicals that damage turf fibers.
Maintenance Schedule
| Frequency | Task | Time Required |
|---|---|---|
| Weekly | Brush fibers upright, remove debris | 15–20 min |
| Monthly | Deep clean with mild soap and rinse | 30–45 min |
| Quarterly | Check drainage, inspect seams, add infill | 1–2 hours |
| Annually | Full inspection, deep clean, infill refresh | Half day |
Infill sand requires periodic replenishment, especially in high-traffic areas around cups[7]. Add sand as needed to maintain proper levels, distributing evenly and brushing smooth. Remove leaves and organic debris promptly to prevent staining and fiber matting[6].
Seasonal maintenance includes thorough cleaning before winter storage in harsh climates, checking drainage systems after heavy rains, and inspecting seams for separation[8]. Quality installations provide 10-15 years of reliable performance with proper care.
How Do You Add Features That Improve Practice Quality?
A basic green is great, but adding a few features transforms it into a comprehensive short game training center.
Fringe area: Install a strip of slightly taller turf (1-1.5 inch pile height) around the green perimeter. This creates realistic fringe conditions for bump-and-run chip shots and teaches you to read the transition between rough and green. Knowing when to chip vs pitch will help you get the most out of this area — tour players chip far more often than most recreational golfers realize.
Practice bunker: Excavate a 4x6 foot area adjacent to the green, line it with landscape fabric, and fill with 8-10 inches of bunker sand. Even a small sand trap dramatically expands your practice variety.
Multiple pin positions: Install 3-4 cups across your green at varying distances and slope angles. Rotating pin positions between practice sessions keeps your chipping sharp and prevents you from grooving one distance.
Chipping mat: Place a hitting mat above the green to protect surrounding natural grass from divots during practice. This is especially important if you're chipping from your actual lawn rather than a dedicated tee box.
Target flags and distance markers: Add small flags or markers at 10, 20, and 30 yard distances from common chipping positions. These visual references help you practice distance control, which is the most important skill in the short game. Dialing in putting speed control on the green itself rounds out your practice so chips that land close actually convert into one-putts.
Building Your Practice Haven
A well-constructed DIY chipping green transforms your backyard into a personal practice facility, providing convenient access to short game improvement[4]. Focus on quality materials and proper installation techniques for long-lasting results that enhance both your golf game and property value. For budgeting, see our backyard putting green cost breakdown. Once the green is built, stripe your surrounding lawn like a golf course for the full professional look, and learn how to make your whole lawn look like a golf course. Start with careful planning and don't rush the base preparation — this foundation work determines your green's ultimate success and longevity.
Sources
- University of California Agriculture and Natural Resources — Landscape construction and drainage engineering standards
- TurfGrass Producers International — Synthetic turf installation and material specifications
- Golf Course Superintendents Association of America — Professional putting green construction guidelines
- National Recreation and Park Association — Home recreation facility planning and design
- Clemson Cooperative Extension — Home landscape drainage and grading techniques
- Texas A&M AgriLife Extension — Turfgrass maintenance and environmental management
- Shaw Sports Turf — Artificial turf manufacturing and installation research
- Sports Turf Managers Association — Professional turf maintenance protocols and best practices
