
Quick Answer
Fix a bumpy lawn by filling low spots with quality soil in thin layers, compacting each layer, and using silica sand for final leveling. Work in sections and use a rake or lawn leveling tool to smooth the surface between applications.
Key Takeaways
- Layer soil gradually like making a cake - never dump large amounts at once
- Compact each layer thoroughly to prevent future settling and bumps
- Use silica sand for final leveling as it compacts better than regular soil
- Focus on eliminating major dips rather than achieving laser-perfect leveling
- A rear roller mower helps maintain smoothness over time
Understanding Why Your Lawn Becomes Bumpy
A bumpy, uneven lawn isn't just an eyesore—it creates practical problems that affect your entire lawn care routine. When your mower can't maintain consistent height across dips and rises, you end up with scalped high spots and overgrown low areas. Trenches and depressions also prevent proper water drainage and make it impossible to use lawn care equipment effectively.
Most lawn bumps develop from settling soil, removed landscape features (like old flower beds), or simply years of foot traffic and weather patterns. For a deeper look at the root causes, check out why lawns get bumpy and our list of lawn leveling mistakes to avoid. The good news? You can fix these issues with basic materials and tools you probably already own.
Essential Materials and Tools You'll Need
Before starting your lawn repair project, gather these materials:
- Quality topsoil or lawn soil mix
- Silica sand (preferred over regular sand for final leveling)
- Grass seed appropriate for your lawn type
- A flat rake or lawn leveling rake
- A lawn roller (or you can do the "penguin walk" method)
- Garden hose for watering
The beauty of this approach is its simplicity—you don't need expensive equipment or professional tools to achieve professional-looking results.
The Layer-by-Layer Repair Method
The key to permanent lawn bump repair lies in working gradually. Think of it like baking a layered cake—rushing the process leads to poor results.
Start with soil preparation: Identify your problem areas and begin filling the lowest spots first. Add soil in thin layers, never more than half an inch at a time. This prevents the organic matter from decomposing unevenly and creating new bumps later.
Compact each layer: After spreading each thin layer of soil, compact it thoroughly. You can use a lawn roller, or simply do the "penguin walk"—shuffling across the area with small steps to press the soil down evenly. This step is crucial for preventing future settling.
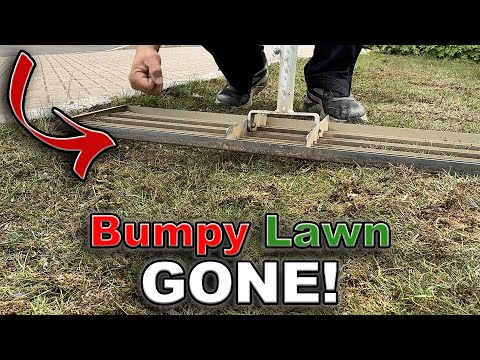
Level with your rake: Use the flat side of your rake to smooth and level each layer. Work in multiple directions, pulling excess soil from high spots into low areas. The goal isn't perfection—focus on eliminating the major dips that cause mowing problems.
Repeat the process: Continue adding thin layers, compacting, and leveling until your repair area is roughly flush with the surrounding lawn. This might take 3-4 cycles for deeper depressions, but patience here pays off with lasting results.
Fine-Tuning with Silica Sand
Once you've built up the major low spots with soil, silica sand becomes your secret weapon for achieving that final smooth finish. Unlike regular soil, silica sand compacts more uniformly and doesn't shift as much over time.
Spread a thin layer of silica sand over your repair area and work it in with your rake. The sand will settle into small irregularities that soil alone can't address. Push the rake in different directions to ensure even coverage—you'll notice how the sand naturally flows into tiny depressions.
This final sanding step is what transforms a decent repair job into a professional-looking result that will mow evenly and look great.
Seeding and Long-Term Maintenance
After your leveling work is complete, overseed the repaired areas with grass seed that matches your existing lawn. You can also topdress to further smooth the surface over time. Work the seed gently into the soil surface with your rake—don't worry about disturbing the sand slightly, as this actually helps the seed make good soil contact.
Keep the seeded area consistently moist until germination occurs. Consider using a light covering like landscape fabric if birds are a problem in your area.
Remember that lawn leveling is often an ongoing process. Plan to reassess and touch up any settling areas the following growing season. Each time you mow with a rear roller, you'll continue to smooth and improve the surface.
With this methodical approach, you'll transform your bumpy lawn into a smooth, professional-looking landscape that's both beautiful and practical to maintain.